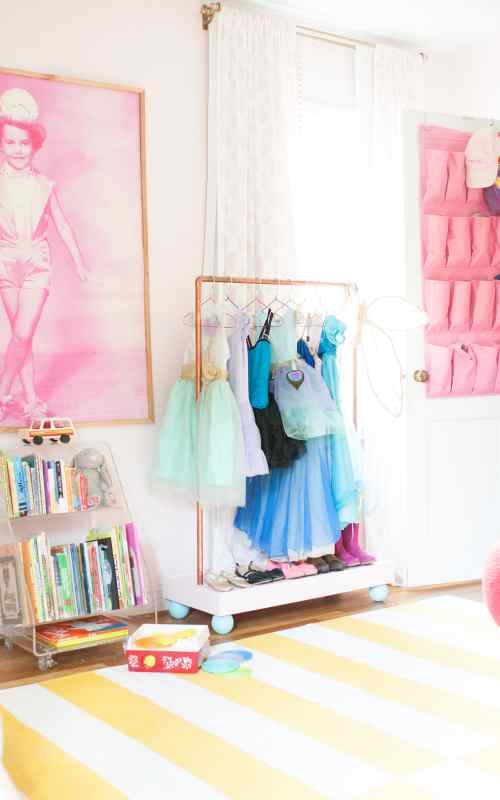
DIY dress up rack

Last week, I shared the details of the sweet little ballet barre that Chip installed, and today I'm sharing the how-to on the cute dress-up rack. It was a really simple project, that involved no cutting, and very little hardware.
What you will need: (It's very similar to this, but without the cutting and string)
Five 2' lengths of 3/4" copper pipe | Two 3/4" copper elbows | Four 3/4" copper tees | Two 3/4" copper tube straps | Four screws for straps | Drill, Hammer, and Nail or Punch

Simply fit all the pieces together and using the nail or punch, hammer the connection points to make certain they will stay together (see this post for a detail picture of this). This is really important to make certain the pieces stay together. I'd recommend pulling on it a bit to make certain it's tight enough, and make certain the littles won't decide to use it as a trapeze. At the top, place two tee joints and attach them in the same way. Using the tube straps, attach the top tee joints to the ceiling and screw in place.
The bottom of the rack ends up being about 4' off the ground, which is within easy reach for Vivi, and the upper rail is out of her reach, but sometimes I like having some storage that they can't quite get to!

It's the perfect little spot for hanging costumes and such, and it's nice that it takes up so little space! Check out this post for details about the ballet barre and some of the other fun items pictured here.


Discussion